Developer Console
Introduction
Developer Console is a dashboard for developers to manage their App including Credential management, Shop Management, and other features. You can access the developer console using this link https://developer.tokopedia.com/console.
Getting Started
Before using developer console features, you need to create Tokopedia account and register your account as a developer account. We recommend using corporate email than personal email when you register because this email will be used as a super admin role, updates regarding API, and Jira Service Desk login. On the other hand to use developer console features you need to prepare your Business Registration Certificate as a PDF file.
Registration
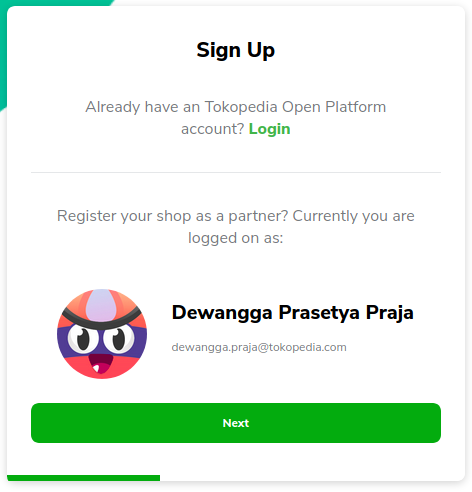
You can log in or create a Tokopedia account from the login button on the top-right menu.

After login into your Tokopedia account, your account information will be shown like this. Click the next button to start filling the form.
There are several fields you need to fill
- Company name
- PIC Contact Name
- PIC Contact Number - Active phone number from the PIC
- Business Registration Certificate / Surat Ijin Usaha Perdagangan - Upload as PDF file, please make sure that the file is not corrupt and doesn't have any password. The file will be used to ensure that you have the privilege to handle the Tokopedia shop.
- Company's Profile - Upload as PDF file, please make sure that the file is not corrupt and doesn't have any password. The file will be used to ensure that you have the privilege to handle the Tokopedia shop.
- Company Website URL
- Type of Member - Third Party Enabler if you don't have direct access as Tokopedia shop owner but you want to connect with multiple shops that have contracts with your company to handle; Seller if you have direct access as Tokopedia shop owner and your shop should be Official Store.
- System - In-house if the API integration were handled by your company yourself; Third Party if the API integration were handled by a third-party or vendor.

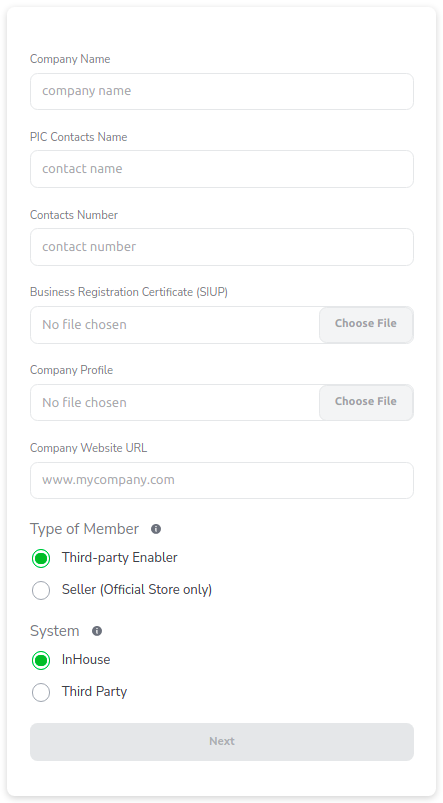
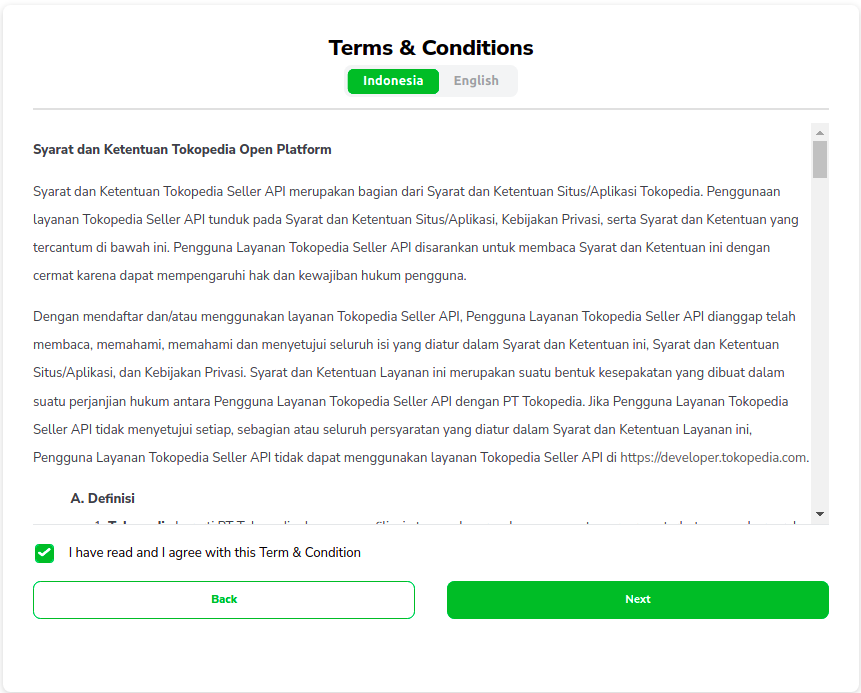
You can go to the second step after complete all your form. There will be Term and Conditions that you have to read and agree to. Check the box when you have agreed then you can submit your registration.

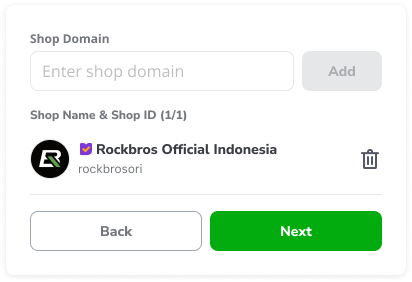
For Seller Type Member, you only need to submit one OS Seller in the 3rd step. You are not allowed to submit anything other than an Official Store. Once you submitted it correctly, you are good to go to the next step.

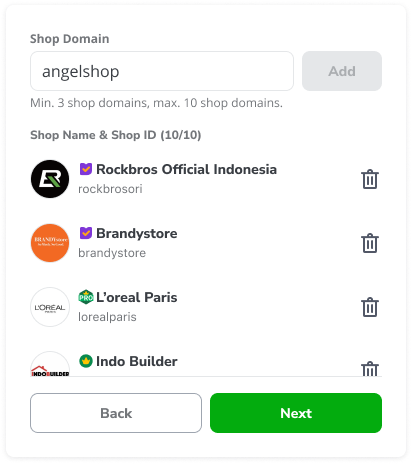
For Third-Party Enabler Type Member, you need to submit at least 3 Seller and a maximum of 10 Seller. You may submit an Official Store, Power Merchant, or Power Merchant Pro. Once you submitted it correctly, you are good to go to the next step.
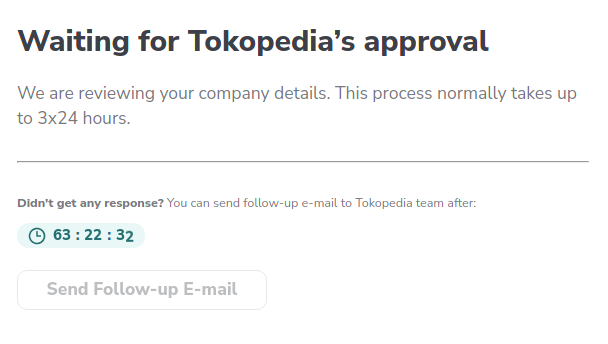
Tokopedia will approve your registration process if all your data has been verified. You will get an email regarding the approval process to your email either get approved or rejected by Tokopedia. You will also get a verification link to get access to the Atlassian Jira Service Desk, that will be used to create a ticket regarding a question, report bugs, and/or request a new feature.

Once your request is approved by Tokopedia, we will send an email notification to each Seller that you submitted on the 3rd step. While waiting for The Seller's approval, you may also add/edit the draft Seller that you would integrate with on the 5th step.

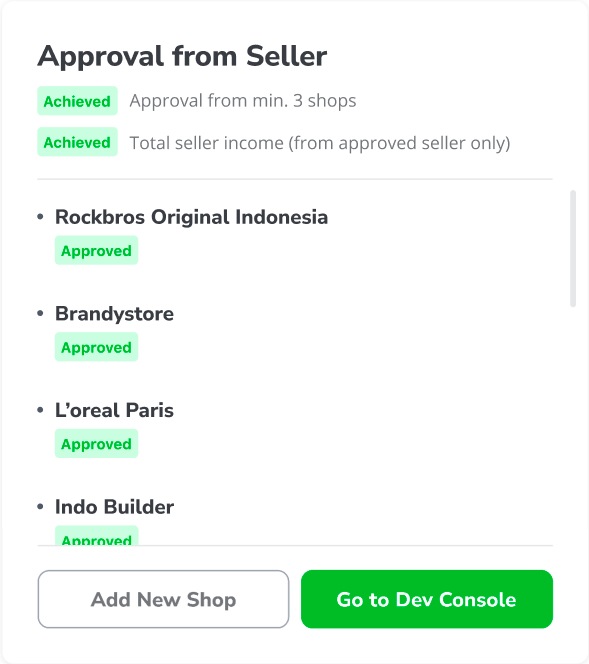
Once every requirement on the 5th step has already been fulfilled. You can go to the developer console page and you will have your default app integrated with your submitted Sellers.
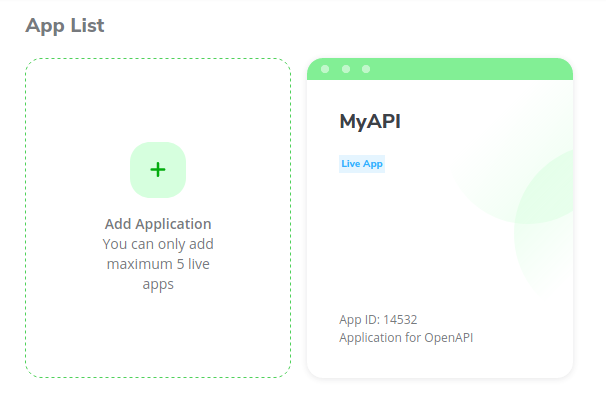
Create Application
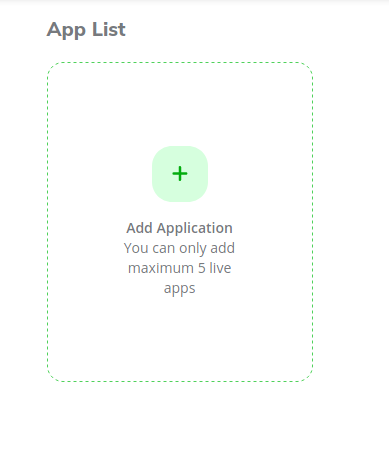
For one account you can only have a maximum of 5 live apps. An app has only one App ID, Client ID, and Client Secret each, but can manage multiple Tokopedia shops. To add an application you can click the plus button like this.
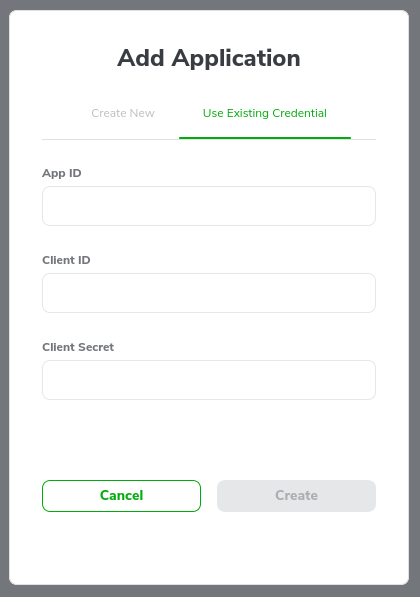
There will be two kinds of activities you can do here.
- Create a freshly created App.
- Import existing App with their shop already mapped to the App ID.
Create a new app you can simply complete the form below using App Name and App Description.

When you import the existing App ID you need to complete the form using App ID, Client ID, and Client Secret. This is used for a previous partner that has ever request credentials directly from Tokopedia and is currently active but doesn't have a developer console yet.
After adding an application to your account, you can click on your app to see the menu and use features in the developer console.